GONZO my 1982 Freedom 25 sailboat

GONZO my Freedom 25 yacht:
This blog will document the continued restoration of my 1982 Freedom 25 sailboat, along with all the experiences I have. I purchased my F25 in the winter of 2009 from the 3rd owner who had the boat in NH. Gonzo has a composite rotating winged mast, yanmar inboard diesel, a Gun Mount spinnaker pole and staysail. This is my 1st cruising sailboat and I look forward to learning how to maintain and slowly restore and sail in Narraganset.

Saturday, August 13, 2011

2nd Sea Trial:

So after about 2 weeks of pulling the boat together, and getting her ready for round 2, with this being said what I'm finding with boating is that you just can't always be prepared even when you think everything is taken care of. I found this out the hard way during this Sea Trial.

2nd Sea Trial:
1. got motor running really well, and boy what a difference
2. sorted out sail issues, including setting up 1st reef as a Cunningham
3. wind was from NW 5-10knots, boat did really well sailed down to Jamestown bridge and back.
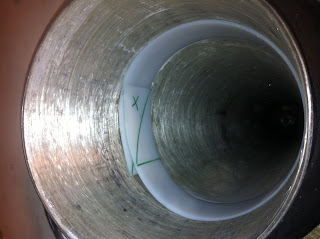
4. Everything great until we looked in the cabin to find about 50-100 gallons of water in the boat. in the end found the bilge drain tube was pumping water in the boat, I also found out that the OEM hand pump bilge hose was dry rotted and had holes so did not work properly.
5. with all of this going on and a bit of crazy time, the boat did great and got us home.
6. today will fix the problem with a 1.5" check valve and new Y connector, I will also service the OEM bilge pipe so it has sections which can be serviced.

Review: in the end I am really happy with the boat we were doing 5+ knots on reach with just the main. I have a lot of learning to do as this boat sails like a windsurfer, and the winged mast really does make a difference. can't wait to play with the Kite and staysail.

Friday, August 12, 2011

1st Sea trial: ups and downs

SEA Trials, the ups and downs:
Well for owning this boat and doing a good amount of work on the boat including changing many of the system, I am in the process of doing sea trials to make sure all the systems on the boat are working properly this is my record of accounts:

1st sea trial: (the day after the boat was launched)
1. got half way out of harbor, and found that the fuel lines were crossed and buried under the driveshaft causing it to hold the shaft from spinning not allowing the prop to open, it also was wearing through the fuel line causing air to enter the system.
2. battons for main had tension issues, and main had some fitment issues to the mast and spar:
a. the slide on the clew of the main would not enter the boom slot
(solution was to remove the end cap and pull sail out and put slide in far end)
b. tack needed to be attached some how
(used a strap of 12 strand with a ball loop)
c. their is a pin at the bottom of the mast track to to keep sail from falling out of track.

Monday, August 1, 2011

Gonzo my F25 Sailboat Floats: 1st pics from the dock

Here are the 1st pics I took from the dock, I have named my boat "Gonzo" I will give a few report in the near future. Since this date I have moved to my mooring and working towards my 1st sea trial.


The Launch: Pleasant Street Wharf RI 7-29-11 4pm


Well the long awaited time came, I did not get as much done as I hoped before this date but I had to get this boat in the water as the summer was going by quick: here are some pics I took, I have to say for all the planning and prep I sure did make a mess of the whole process and really need to thank the guys at Pleasant Street Wharf for staying late and allowing me to get her in the water and to the dock.


yes I know I missed a spot for bottom paint. mental note when you don't sleep for a few days and go to launch your 1st boat you tend to miss some things ;)


Freedom 25: forward berth cabin sole repair

When I purchased my boat it had some water damage from a leaking forward hatch. this was the result the pic is after I tore up the old rotted floor. Below are a few pics of my repair, sorry for the yellow pics the light was not great as I did all the work at night with a shop light.

This is what I started with after removing the damaged cabin floor, after looking around I found the section of floor is supported in sections inside hatches. I decided if I'm going to do the work I should do it properly.


you can see that I removed the old rotted floor, to get this far I had to remove starboard and Port rear berth tops and all hardware.


this is what is left, the white wood floor is the angled section. After removing all the old wood and berth sections you can see it is a lot easier to work and repair this floor section as all the supports are easy to get to and flat.


I made a template out of cardboard and used it to cut my new floor. I wish I had the $$ to use the teak and holly to match the rest of the cabin.


A quick test fit and it's ready to go back together. after putting it all back together
Note: I would suggest to lay up all the berth section including top parts before attaching the curved part to make sure it all fits.


detail shot


detail shot: note forward berth support installed.


All done, you can see in this pic that I also replace the Port upper berth top. all that is left is a few finish coats and should be like new.


Freedom 25: winged mast upper bearing service

Here are a few pics of my recent service of the upper teflon bearing on my rotating wing mast for my Freedom 25. as you can see from the wear inside the tube that the previous owner never serviced this bearing, and had been using the boat with out an material.
This shows the inside of the F25 mast tube, the slightly darker section is an indent which is 2 inches wide and is designed to take a Teflon or similar plastic. when combined with the stainless ring on the mast work as a bearing.


here you can see the plastic insert I purchased. After doing some research I found that their is a number of plastics which will work just as well as Teflon but at less then half the price.
*note: I test fit strip and messured 3 inches of overlap and marked with a green marker. pic below


pic of the test fit, you can see the over lap of the strip. the diagonal line is were I am going to cut, the x is the side I will cut off so the 2 ends will fit nicely together.


here you can see the trimmed ends of the strip. I used a jig saw which cut very cleanly with no burs.


Finished: unfortunately because of material nothing will stick to it so you need to use the tension of the material to hold it in place.